Setting up Panda for application publishing(alternative to RemoteApp)
JumpServer supports using both Windows Server and Linux as application publishing machines, such as for publishing Chrome and Firefox browsers for HTTP sessions and various database clients.
Types of Application Publishing:
Microsoft RemoteApp: A method of publishing applications based on Windows Server, providing maximum smoothness. Requires additional configuration of Windows Server and the purchase of Microsoft RDS CALs.
Panda (Virtual Application): A Linux-based application publishing method, characterized by medium smoothness, good compatibility, and support for operating systems like CentOS, RedHat, Kylin, and openEuler.
Setting Up Panda for Application Publishing
Principle of Operation:
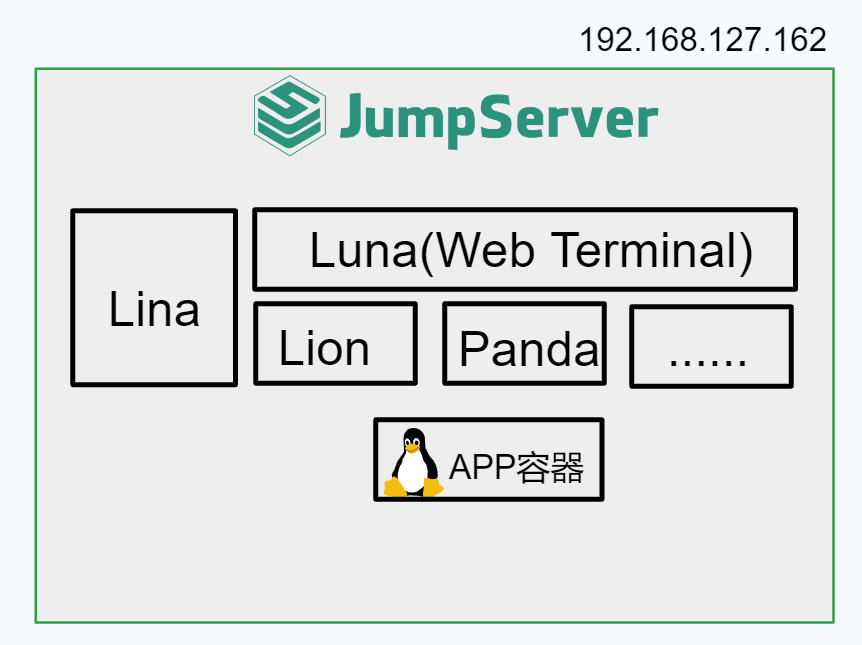
The Linux-based application publishing machine uses container technology to isolate the application in an independent runtime environment. The Panda component provided by JumpServer manages virtual applications.
The process looks as follows:
1. The user accesses the JumpServer Web Terminal and connects to the selected virtual application.
2. The Panda component creates a GUI container based on VNC and forwards the VNC connection information to the Lion component.
3. The Lion component connects to the container.
Deployment Schemes
Scheme 1: All in One
Using the server where JumpServer is deployed as a machine for publishing virtual applications.
1. Configuring the Main Configuration File
Open the main JumpServer configuration file.
nano /opt/jumpserver/config/config.txtAdd the following parameters to it:
# Enable the Panda component
PANDA_ENABLED=1
# Enable virtual applications in the core
VIRTUAL_APP_ENABLED=1
# Panda host IP address (JumpServer IP)
PANDA_HOST_IP=192.168.127.162
# URL for Lion to connect to Panda
PANDA_HOST=http://panda:9001
Restart the JumpServer service to apply the changes.
[root@localhost ~]# jmsctl restart2. Enabling the Virtual Applications Feature
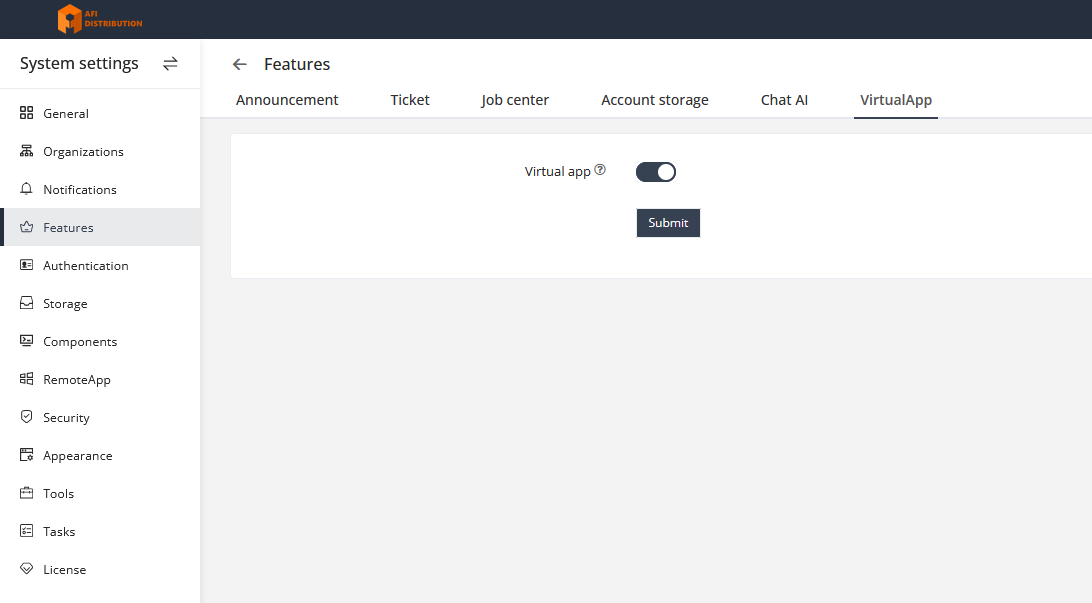
In the JumpServer management console, go to System Settings → Features → VirtualApp and activate the virtual applications feature.
3. Loading Virtual Applications
Download virtual applications locally. Currently supported:supported applications include:
Chrome browser,, DBeaver. database client. Distributions for these applications are available on the vendor'svendor portal;. Applications for Panda applicationsare arelocated in the Virtual App section, while others are only for RemoteApp (RDS).
In the JumpServer management console, navigate to System Settings → RemoteApps and upload the virtual applications in the VirtualApp section.
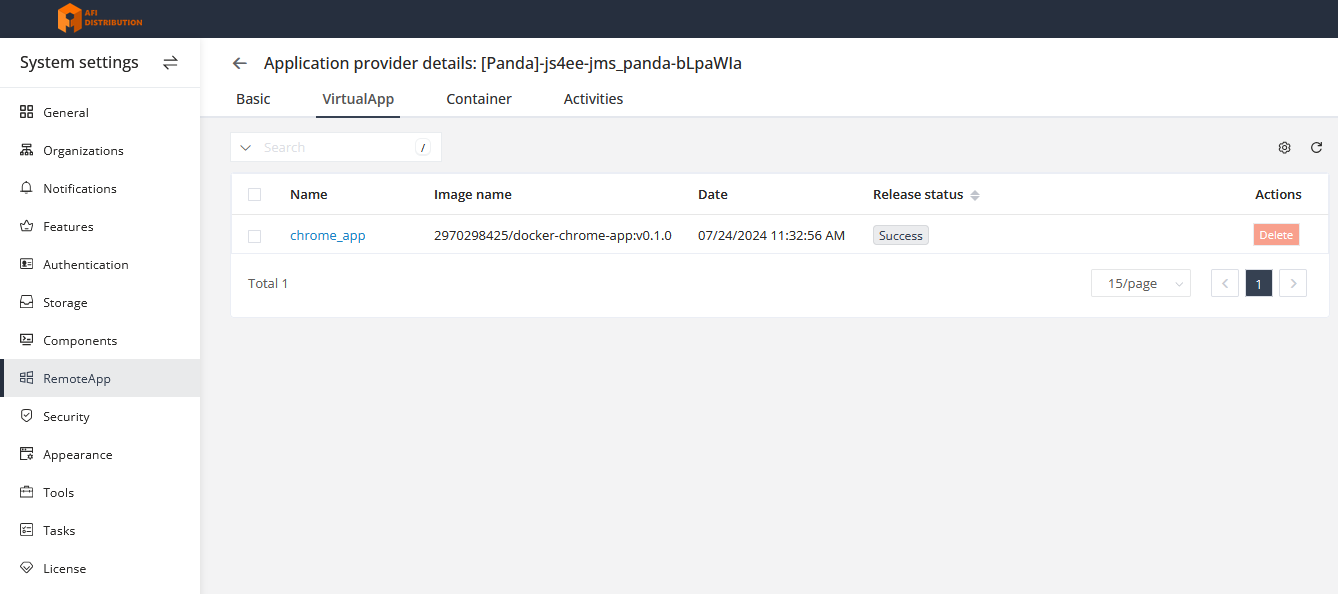
After a short wait, the application will automatically deploybe deployed on the application publishing machine. In the JumpServer management consoleconsole, under System Settings → RemoteApps → Application Providers → VirtualApp, you can see the successful applicationdeployment deployment.of the application.
4. Using Virtual Applications
Connect to assets using virtual applications.
Note: At this point, the JumpServer service will launch the virtual application container: 2970298425/docker-chrome-app:v0.1.0 (Note: this container is approximately 1.3GB in size and requires downloading over the Internet. In a local network, it can be manually downloaded).
Scheme 2: Panda on a Separate Server

1. Configuring the Main Configuration File
Open the main JumpServer configuration file.
nano /opt/jumpserver/config/config.txtAdd the following parameters to it:
# Enable the Panda component
PANDA_ENABLED=0
# Panda IP for the Lion component
PANDA_HOST=http://192.168.127.163:9001
Restart the JumpServer service to apply the changes.
[root@localhost ~]# jmsctl restart2. Installing Panda on a Separate Machine
Unpack the JumpServer installation package on the publishing machine, install Docker and Docker Compose, and load the image.
[root@panda ~]# tar xzvf jumpserver-offline-release-v3.10.6-amd64.tar.gz -C /optInstall Docker and Docker Compose:
[root@panda ~]# cd /opt/jumpserver-offline-release-v3.10.6-amd64/scripts
[root@panda scripts]# ./2_install_docker.sh
Load the Panda image:
[root@panda scripts]# cd images
[root@panda images]# docker load -i panda:v3.10.6.tar
Create a docker-compose file for Panda:
[root@panda ~]# mkdir -p /data/jumpserver/panda/data
[root@panda ~]# mkdir -p panda
[root@panda ~]# cd panda
[root@panda panda]# cat docker-compose.yaml
version: '2.4'

services:
  panda:
    image: registry.fit2cloud.com/jumpserver/panda:v3.10.6
    container_name: jms_panda
    hostname: jms_panda
    ulimits:
      core: 0
    restart: always
    ports:
      - 9001:9001
    tty: true
    environment:
      - BOOTSTRAP_TOKEN=YmEyNTRkNTYtNDIyMi02OTJm
      - CORE_HOST=http://192.168.127.162
      - NAME=panda
      - PANDA_HOST_IP=192.168.127.163
    volumes:
      - /data/jumpserver/panda/data:/opt/panda/data
      - /var/run/docker.sock:/var/run/docker.sock:z
    healthcheck:
      test: "curl -fsL http://localhost:9001/panda/health/ > /dev/null"
      interval: 10s
      timeout: 5s
      retries: 3
      start_period: 10s
BOOTSTRAP_TOKEN is taken from the JumpServer configuration file: /opt/jumpserver/config/config.txt
CORE_HOST - The address of your JumpServer
PANDA_HOST_IP - The IP address of Panda
Start the Panda container:
docker-compose up -d3. Enabling the Virtual Applications Feature
Repeat the steps from the All in One section.
4. Loading Virtual Applications
Repeat the steps from the All in One section.
5. Using Virtual Applications
Repeat the steps from the All in One section.